|
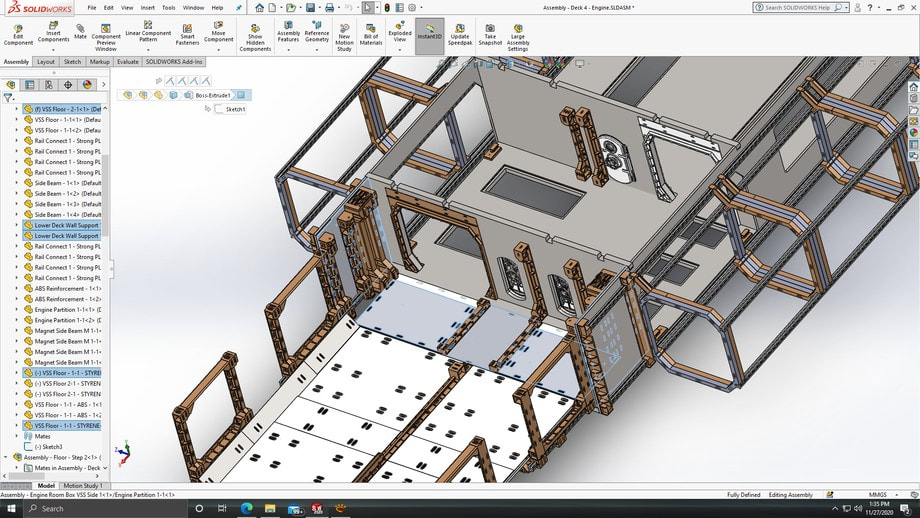
Bad News! There's been a disaster. The primary laser cutter is down! Started going crazy right in the middle of doing some cuts. DioWarriors uses a number of laser cutters. We have two from FLUX, a company in Taiwan (we also use 3D printers from FLUX). Well, it's been a crazy week with Thanksgiving approaching (now past) and I'm working on the orders too. Lots going on. All the printers and laser cutters are busy every day from the morning to night. Things wear down with use. A control cable within our FLUX BeamBox -- the primary cutter -- must have flexed too much and broke, at least according to the tech support. So a replacement cable is on the way, all the way from Taiwan. In the mean time we're not slowing down. Engine Room Continues The next stage for the engine room is the portion that comes in direct contact with the VSS. Deck 4 is 002's central deck and the engine section connects to it. The way it connects is via rails and a linkage assembly. The engine section simply slides along the rails until it connects. So the engine section is in two parts -- the rear which has the thrusters and all the stuff I've been posting about and then a small part -- the inner section (in blue in the screenshot) -- that fits directly inside the VSS deck 4. This inner section is critical and it has to be strong to support the weight of the engine section. So the approach I've taken is to design this like a box that fits into the VSS structure. 002 Has Been Moved! VSS 002 is now in my Joe Room. Currently it sits on a 6' table -- one of those folding types -- and already it is obvious it's going to need a longer table. But having it in the Joe Room will make it easier to show it in a video. It'll be easier to show up dates as it gets worked on. Not Taking a Pause, But.... So, for the last few weeks I've been posting about the engine room section and it might seem like there's been a slow down with this VSS project. But that's not the case at all. There's just a lot of details to make right before committing resources. I've been going back and forth updating objects as I get nearer to 3D printing them. For example there's a lot of beams to support the floor or the walls. Since they take hours to print, and there's many of them, I can spend a week or two printing one set of beams. So I need to make sure the design is not going to change, which might require a reprint. So I inspect those beams, making sure they will print correctly, that the design is sound so I won't need to alter those beams in the future, that they fit correctly...I'm not taking my time on it, just being sure before committing. With JoeFest being the target deadline and there's much to do still, there's no luxury to reprint too often. New Props and Such
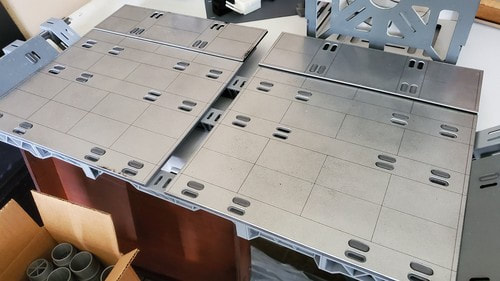
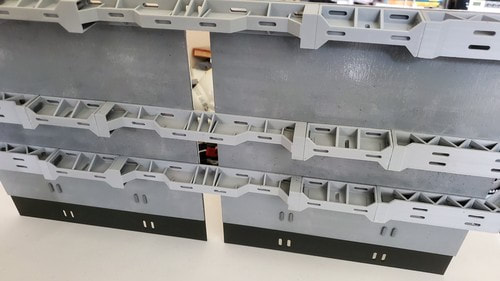
Now with VSS 002 in the Joe Room and the project is coming together, I find myself thinking of new props -- not just for this project, but props that can be used in general for any project. My thoughts are returning to the generic machinery that were in the DioWarriors Store years ago. Those are going to be updated very soon. New consoles and displays are also going to be looked at. New tables and cabinets, and other things needed in a diorama to fill-in. Stay tuned because things are going to heat up! :-) Other segments for the VSS Space Carrier 002 are being worked on. Some of these segments I have returned to finalize them and prepare them for 3D printing and laser cutting. There are some slight changes -- alterations, modifications, adjustments -- but for the most part the design remains consistent to what has been previously shown in this blog. Engine Compartment Round 2: The first round of posts for the engine room showed the intent for the design. Since then I've gone back to the engine room to finalize the assembly. What this means is I started to assemble the engine compartment virtually, as if the CAD drawings were completed. Using the CAD program SolidWorks I made an assembly for the beams -- the joists that will support the underside of the floor -- with all of the pegs that the joists will require. Then I made another assembly and attached the floor, which will be laser cut wood. I then made a 3rd assembly combining the previous two assemblies. I kept doing this, making a new assembly, until I was satisfied that how I assembled virtually in SoldiWorks will be exactly what I will expect for the physical model. I proofed everything: seeing how all the parts fit, double checked the clearances, taking into consideration the types of plastics and the way the parts will be made. Then I started the print. First, 3D print the joists/beams. Each component would take hours, some as much as 8 hours. To do half of the floor I would need three sets of these components. Next came the laser cutting step. First I laser cut the wood and the ABS sheets. For the styrene I wanted to paint it in two colors, black first, and a top coat of titanium. The idea is that I can use a low power laser to score a bit off the titanium exposing the black paint underneath. This will be good for doing small details, such as panel lines. I was about to do other little details, such as screws, but at the last moment I thought against it. The wood is sandwich between a layer of ABS, both at the top and bottom, and styrene at the very top. The styrene, being a very thin sheet, will help the floor have a very smooth surface. I didn't want the grain of the wood or the rough "dimple-like" surface of the ABS sheets to be visible as surface textures. Next:
Next up will be the other half of this floor. The joists are currently being 3D printed, and the laser cut parts are already done. After that will come the walls. At the same time I have started the assemblies for building the engine component that fits into the VSS itself. That part is a challenge all it's own. |
DioWarriorsLatest News blog thingy. Archives
May 2024
Categories |


 RSS Feed