Setting a Foundation: Before we can actually get started, we have to set some basic understandings of the lines we are going to compare. Most of the American lines resemble the same sort of construction and range of movement. Acid Rain World is not an American line and the difference is noticeable. Build-n-Brawl (BnB) is a 1:18 scale action figure by Jakks Pacific based on professional wrestlers. They came out a few years ago and their construction enables for great wrestling poses. Concerning this review, the head/neck uses a barbell system where two spheres are joined with a rod. One sphere goes into a socket at the base of the head, and the other sphere into a socket in the neck. GI Joe by Hasbro most likely doesn't need much description. The way a GI Joe figure is constructed is duplicated throughout the 1:18 scale action figure market. For this review the neck is a single piece connected to the upper torso. The end of the neck ends with a sphere which fits into a socket at the base of the head. The torso is divided between an upper and lower sections for body swivel. The swivel actually has some pivot for enabling the figure to bend forward, but the range of pivot is extremely restrictive. For some Joes, the wrist have a pivot for horizontal hand movement and a pivot for vertical hand movement, one pivot direction per hand. Some Joe figures have "rocker" ankles, others do not. Marauder Task Force (MTF) by Marauder Gun Runners (MGR) uses figures designed by Boss Fight Studio. The head and neck resemble those of the GI Joe line with a ball and socket for the neck and head. The torso swivel is actually at the waist of the figure and is actually a ball and socket. Hands have the same pivot for horizontal or vertical movement as the GI Joe line. Acid Rain World (ARW) by Ori Toy is another action figure line that recently hit the market (just months before MTF) boasts the most articulation of a 1:18 scale figure (possibly with the exception of Microman by Takara-Tomy.) Ball and socket head/neck construction, torso divided into an upper and lower half, and hand pivots similar to GI Joe and Marauder Task Force. But ARW figure design is quite different that even though there are similarities, there are differences within those similarities that it's like comparing a different class of figure. Vitruvian HACKS: For the basics, The BFS HACKS lives up to the HACKS acronym: Highly Articulated Character Kit System. The figures are designed with customizability in mind. Hands and feet are easy to remove and replace. Additional hands are included with the figure. One set of hands have a horizontal pivot, the other set has a vertical pivot. The head and neck are sockets connected by a barbell-like connector. The torso is divided into an upper and lower torso. Overall, the construction and aesthetics of the BFS HACKS resemble those of GI Joe and MTF. The range of motion is similar and the HACKS will look at home next to a shelf full of Joes or MTF. Articulation: What you should be aware of is that the HACKS matches the expected de-facto standard of a modern era GI Joe figure at its height. The BFS Spartan will have the same range of motion as Snake Eyes or Duke. The exceptions are the Gorgons and Medusa. Counting the number of points, articulation for these are duplicated for the snake tail section. The humanoid half of a Gorgon/medusa have the same articulation as the rest of the humans in the toy line. The neck for the HACKS is particularly more poseable than GI Joe or MTF as the neck and head are mounted on a barbell. The range of motion for the head is like that of a Build-n-Brawl: good head pivot for looking up or down. The barbell itself is interesting as unlike a BnB barbell, the HACKS has spheres of two different diameters. The smaller diameter fits into the socket at the neck, the larger into a socket at the base of the head. The two different sizes enables some compatibility with other toy lines: a BnB head could be mounted onto a HACKS neck, or a Joe head could be mounted onto a HACKS. Likewise a HACKS head could be swapped to a GI Joe or MTF body. The compatibility might not be seamless -- there will be some looseness or tightness issues -- but a customiser can easily overcome those things. Compared to Acid Rain World, the socket at the base of the head is not compatible with HACKS unless some serious work is done. Can not simply LBC an ARW head onto a HACKS. Legs and feet with HACKS are standard and are like what one comes to expect from a typical American line. The legs are connected to the hips through a ball-and-socket. One can not simply pull the legs off of a HACKS, though. MTF can be pulled off, ARW, but not Joes, and although we haven't tried it, it looks like the HACKS needs to be disassembled to separate the legs. HACKS only have the standard up/down and rotation for the feet. This is similar to MTF and most GI Joes. Some Joes have rocker feet, and all ARW have both rocker feet and the standard articulation -- the feet pivots up/down, rotates, and rocks side-to-side. HACKS do not. Armor: The armor on the HACKS tend to be a soft, rubbery plastic. Some of the gold/bronze armor we received felt a little sticky or tacky, but after a few hours out of the package the sticky feeling went away. DioWarriors hasn't tried painting (yet) this rubbery plastic, but the armor is well formed to the figure and fits tightly, not loose like many GI Joe armor or gear, and not super tight like some of those from Acid Rain World. MTF gear fits very well onto an MTF figure, but some gear the buckle might be challenging to keep secure. No such issue thus far with HACKS. Spartan and Gorgon armor opens over a figure like a clam, and secures at the waist through pegs. Once secured the pegs do not come undone without some effort. MTF vests and armor fit well with HACKS. Also many GI Joe vests fit well with HACKS. Helmets from ARW did not fit on the standard Spartan. Mixing and swapping armor between MTF and Joes will provide the HACKS with a huge range of possible customs. Weapons: Weapons are made of both a hard and soft plastic. Some weapons are hard, like the sword of a Spartan or Gorgon, and some weapons are soft and flexible, like the dagger and whip from a medusa. Shields are made from a hard plastic, and the interior seems to be made of a flexible plastic, but not so soft as the plastic used with the armor. Details are everywhere with the HACKS. Armor has a lot of detail which are crisp and clear. The Medusa has a unique black with silver trim armor. Belts are brown with separately painted buckles. The snakes as the hair of the Medusa are crisp and have details of the scales as cross hatch patterns. The scales and "skin" of the snake component of the medusa and gorgon are a soft plastic, and the detail and the painting are applied and are well done. Conclusion:
The HACKS live up to the name: they are highly customizable. They are also extremely compatible with other American figure lines. Gear and weapons can be swapped and held with a HACKS, and the extra hands with alternative pivots and the ease to swap the hands means mixing and posing a HACKS with the gear from other toy lines is simple and quick and a customizer doesn't have to spend too much time disassembling a figure just to see if the swapping might work. The HACKS are aesthetically compatible also with the other American lines. Having a HACKS figure standing next to an MTF, or even a BnB, will not look out-of-place. The compatibility of the neck barbell also helps blend the HACKS with the other toy lines. All-in-all, the HACKS offers a lot of potential for customisers and non-customisers. For customisers the potential should be obvious. For non-customisers, the ease of swapping parts with HACKS is a great way to introduce customizing. For diorama enthusiasts, the HACKS system extends the imagination and storytelling potential. Simply put, the HACKS system by Boss Fight Studio is a winner in multiple ways. 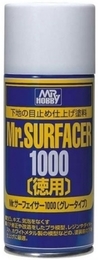 There is much debate in the fine scale model forums about using a Primer or a Surfacer, and what are the differences. Simply put, no one seems to really know what the differences really are. Some brands alternate using the terms primer or surfacer leaving some people to guess that there is no real difference. After all, you can buy a spray primer and cover a surface to paint, and you can do the same thing with a spray surfacer. But there are some differences. Typically a primer is simply to prepare a surface for painting, especially if the surface has differences in color. Use a primer to make the surface a uniformed color. Then paint over that. A surfacer is a little different. It's used to prepare a surface -- to cover holes and seam lines: to make a uniformed surface. A surfacer can be thick and many use a rating system similar to sandpaper to indicate coarseness. For example, a surfacer with a rating of 500 will be more coarse than a surfacer with a rating of 1000. And a surfacer with a rating of 1500 will be less coarse than the 1000. The higher the number the more smooth the surface.
Use a surfacer for additional finishing, such as sanding. Let's say you have a prop with a surface that has seam lines, or even layer lines, like those from a 3D Print. To help smooth the surface sand it first, then apply a surfacer. Sand some more. Then prepare for painting with a primer. Not all surfacers will work well with all materials. For resin use a resin surfacer. The Japanese brand "Mr. Hobby" is a great line of products for the injection model enthusiast. They produce primers and surfacers for plastics, resin, and metal. Use "Mr. Resin" for a resin surface. "Mr. Metal" for metal surfaces (such as photo-etched metal parts), and Mr. Hobby for the plastic commonly used in injection model kits. The Mr. Hobby line also has combinations, such as a "primer surfacer." Our very own Shane is back with another awesome Rum Powered Review with a Star Wars Black series Stormtrooper. 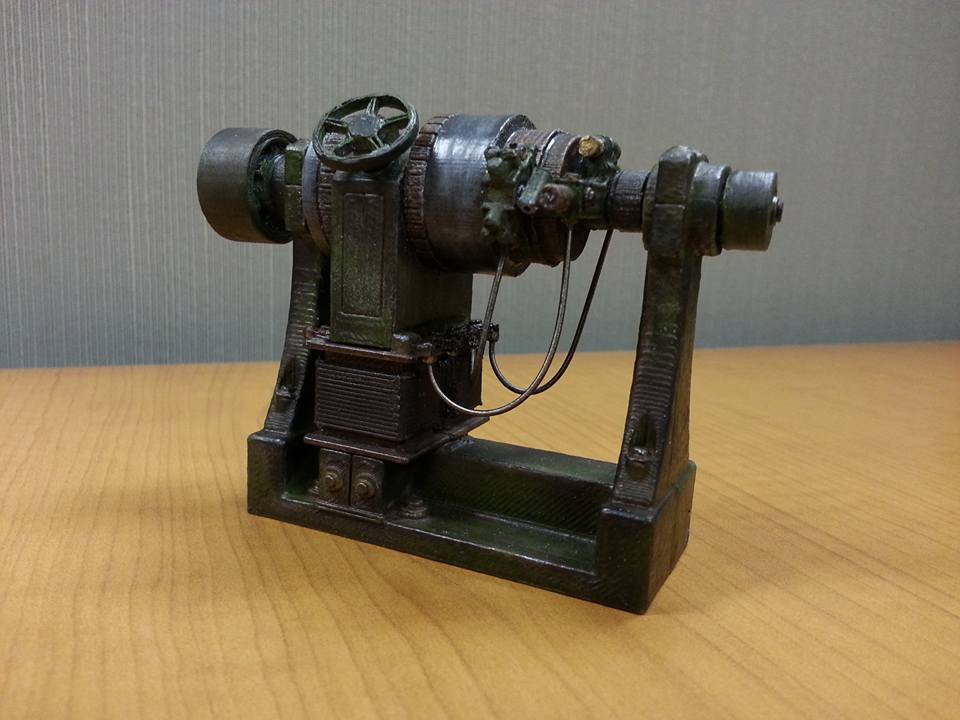 DioWarriors generator prop with spray paint, enamel, and acrylics including metal based paints. DioWarriors generator prop with spray paint, enamel, and acrylics including metal based paints. Painting a 3D Printed prop has it's challenges. There are lots of questions: can paint adhere to the plastic? Do I have to wash the object with detergent first? What paint can I use? A lot of folks stay back from purchasing a 3D Printed prop because of the unknowns. In reference to painting, most of the plastic used in the DioWarriors props are paint friendly. There's a whole world of various kinds of paint, and although we haven't tested every kind of paint possible under the Sun, we have tested and used many types commonly used with Action Figure customs and fine scale model building. This article is a brief rundown of our experiences. Before beginning Here are a few tips:
Acrylics Popular among Action Figure collectors who customize is the use of acrylics. Acrylics are great. They tend to be water soluble and easy to clean up and very friendly to the various plastics used in an Action Figure. Acrylic paint can also be modified easily to yield a unique look. Acrylics are also a great choice for using with a 3D Printed item. Although we have found a base coat first applied to the object before painting with acrylic yields the best results. What happens is plastic like PLA, which is the most common for desktop 3D Printers, tends to be paint resistant concerning acrylics. Several thick coats might need to be applied before the paint starts to look good. So priming the object first with spray paint is advised. One nice thing about acrylics is that they are easy to modify with non-painting materials. Example: combining Future Floor polish (acrylic formula) with acrylic paint can make a stronger coating. Mixing acrylics with metals also work well to make a brilliant finish. For example some props like the DW gold bullion look good when painted with gold, but look better when gold powders are added to the paint. There are many brands of metal powders that you can use to enhance metallic paint. Enamel Less popular with the Action Figure collector, but more popular with fine scale model enthusiasts are enamels. Enamels tend to dry with a hard shell-like coating making the paint resistant to rubbing off from handling. When enamels dry they also tend to have a glossy coat. However, with action figures, not all enamels play well with the various plastics used in an action figure construction. Some enamels dry well on the various plastics while others leave a tacky surface, and still others may dissolve the plastic. However, when it comes to painting a 3D Printed item with enamel, we have had no issues thus far. In fact we have gotten much better results with enamel than acrylics. At DioWarriors we often apply a spray paint primer when dealing with PLA plastic and acrylics. But with enamel we often paint directly onto the plastic, completely skipping the priming step. It may take several coats of enamel to get a good surface, but this is not the norm. Usually just the first coat is enough. Much of the time we like using an enamel paint pen. Lacquer The best results for paints we use tend to be lacquer. We treat lacquer paint about the same as enamel to a 3D Printed item, but adheres stronger. We often don't need to prime the object first, but some lacquer paint brands tend to be less thick than others, so it really depends on the brand. Anyway, we would rather use lacquer for all our painting needs. Lacquer dries/cures quicker than enamel. We don't recommend painting a large area with lacquer unless you have a really wide brush. You'll find that you'll have to go over parts because the paint is drying too quickly. Then you'll have streaking to deal with. Spray Paints When it comes to spraying a DioWarriors 3D Printed model, we use three basic brands: a cheap $3 brand of gray at Walmart for priming, Krylon, and Rust Oleum. Basically, we don't prime very often before painting. The exception is when the model is made of multiple parts that are different colors, or the part is printed in a plastic too dark for a light color we plan to us. Spray painting a multi-color model with a grey (or white) primer is advised as it'll make the overall painting process easier and quicker. Krylon spray paint tends to have no problem with the plastics used with 3D Printing, although the drying time does take a bit longer. But, all-in-all no serious problem. There was one incident worth noting that is mentioned above. Rust Oleum is another brand we like to spray our stuff with. It dries quickly, especially the metallic colors like "Oil Rubbed Bronze" and "Antique Copper." Everything we've tried has had success. Brands Here are some brands we use every day at DioWarriors. We list these out incase you also use them, but are unsure how they might perform with a 3D Printed prop.
In summary, at DioWarriors we love to use lacquer paints for all the painting, but all the 3D Printed props play well with acrylic and enamel too. Still, with so many brands of paints around the world, always take caution before painting something. You never know when something simply won't mix well, or, like in the case of enamel, not all enamels are truly enamels as the term is now morphing into a marketing gimmick.
If you're still wondering, no, you really don't have to wash a DioWarriors 3D Printed prop in detergent before painting. You can, although maybe rubbing alcohol might be better. But no oil or grease ever comes in contact with the plastic during the printing process. Just keep your props as dry as possible and cared as a fine scale model, because that is basically what they are. Not a toy, but a 1:18 scale model prop. |
DioWarriorsLatest News blog thingy. Archives
May 2024
Categories |
 RSS Feed